Info The engine behind this game has major issues, and will not see further attention. Proceed carefully.
You're more than welcome to reference this code, but there are much, much better games out there to look at. I made a number of really crummy mistakes with collisions of all sorts, the story, the title, the warping mechanic, and a lot of more minor things. As such, referencing this code is probably unwise.
I consider this project something to learn from, more than a good example.
Cheers
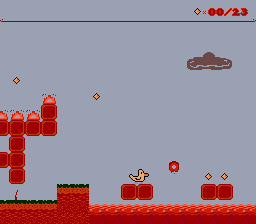
Waddles the Duck is a new NES game developed in 2016/2017 for the 2016 NESDev Competition.
The basic story is, you're a duck that was taken out of his timeline by a mysterious force, trying to make your way home.
This is here to hopefully help someone figure out how to put together an NES game. Hopefully there are some good examples somewhere in this project. That said, this project was developed with a pretty strict deadline, so some corners were cut, and much of this is not well organized, nor well documented. If you get completely stuck, please reach out to the author! (admin@cpprograms.net)
All development was originally done on Windows due to wider availability of tools for that system. Everything works off of a makefile and basic unix commands, so most things should work on any unix-based OS, but as of yet this is untested. If you run into non-windows issues, feel free to submit pull requests!
This admittedly isn't the most friendly toolset - I opted to use tools I knew, even if they aren't the most available. I try to document everything, but I apologize for the potentially painful setup.
After checking out this git repository to a fresh directory, follow the steps below to get compiling up and working.
- Install cc65, and get it on your system's PATH. (How you do this depends on your OS - search google for details)
- (Windows Only) Install Gnu on Windows (GOW), or something like Cygwin to use unix commands.
- Install nodejs 4.2 or later for some level conversion scripts.
- Download and install tools as required from the tools/ folder. Each folder has a readme explaining its purpose.
- Note: At minimum, you want p8nes, and either fceux or nintendulatordx.
- Type
makeand hope for the best! - Assuming the rom compiles and you installed fceux above, type
make runto start the game!
Second warning: This game's layout isn't the most sane thing you will ever work with. I suggest figuring out a system that works for you, probably with more organization than I use, then sticking to it. Some might say this file should really only be a bunch of includes of other files, for example. You have been warned.
main.asm- This contains the majority of the source of the game, and much of what is in the kernel.menus.asm- Some title/ending screens, start menu, and ready screens.bin/- This is where your roms go! (And lots of intermediate files)ca65-utils/nesgame-chr.cfg- CA65 configuration used to put together various prg banks, etc into a coherent rom file.graphics/- All graphics for the game*.nam- Output files from NES Screen Tool for various pre-rendered screens.*.pal- Output files from NES Screen Tool for palette definitions.blocks_x4.bmp- Bitmap version of game tiles that Tiled can understand - used to draw out level.tiled_sprites.bmp- Bitmap version of sprites (all cut to 16x16) that Tiled can understand - used to draw out level.*.chr- Graphics files the NES can understand - generated with NES Screen Tool.
levels/- All information pertaining to levelslvlx.json- Json export from Tiled for the levellvlx.tmx- tmx files for Tiledlvlx_meta.asm- Meta information about the level; tells compiler where to find things - seelvl1_meta.asmfor an example.
lib/- Various helper code.controller.asm- Input routinesending.asm- Scripts to show ending animations/textfamitone2.s- Famitone2 library by Shirugem_data.asm- Little bit of code to update gem parts of the hud. (Split out to put in a non-primary bank.)hud.asm- Heads up display stuff. (The thing that has the gem count)nes_constants.asm- Exactly what it says on the tinnes_macros.asm- CA65 macros to aid in doing common assembly stuff.project_constants.asm- Auto-generated by makefile. Has information like build #, etc.sound.asm- Small wrapper library for famitone2 that also switches banks automatically.sprites.asm- All sprite definitions - Sprite number used in maps references this file.text.asm- All of the text from the two times the professor talks to waddles in the game.tile_definitions.asm- What tiles line up to what ids? The constants in this file can tell you!title.asm- Scripts to show pre-title animations/textunpkb.asm- Packbits decoding asm by Damian Yerrick. (Used for most nametables)
sound/- All music and sound effects code for the game.tools/- Various tools to aid development, mostly referenced frommakecommands. Most of these need some work to install.level-converter- Nodejs tool to convert the tiles in a level to an asm file, which goes intolevels/processedby default.sprite-converter- Nodejs tool to convert the tiles in a level to an asm file, which goes intolevels/processedby default.
All code is compiled with ca65, so it should follow the syntax rules for that language. Code is laid out into 4 (almost) logically separated banks.
- Kernel: All primary game code. Always loaded; not switchable.
- Bank 1: All level information, including tiles, sprites, and meta information.
- Bank 2: Music/Sound and chr Graphics. Famitone2 library, and data files for music and sound. Also contains all graphics used in the game.
- Bank 3: Bulky data. Contains all screens (and some code) for the title/endings, as well as the in-game text engine.
You will have to manually bank switch for anything that is not music. Look for examples of code using things defined in the areas above to see how.
The basic version is to use the bank macros defined in lib/nes_macros.asm to do this. They will cache the last bank you were in, so you can use
a temporary bank, then jump back to the previous value.
As I write more of this readme, I realize how complicated of a beast this thing has become. If you decide to do anything, don't be afraid to reach out for help. I fear I've left some obnoxious things in here I've completely failed to document, due to a simple inability to recall them all.
Level design is done using a program called Tiled, then converted using two simple nodejs scripts in the tools folder.
Open any level with the editor and you should see the level layout, sprites and all. A few notes:
- Levels are split into two layers - one contains all sprites, and one contains all tiles.
- The tile layer cannot have any blank space - every tile must be defined. It cannot contain anything from the sprite tileset.
- The sprite layer has blank space anywhere there is not a sprite. It cannot contain anything from the regular Tileset.
- All tile images are from
blocks_x4.bmp- the color palette is decided by which group you grab from. New tiles have to be imported into this 4 times. - Tile images should not come from rows 2, 4, or 5 - instead always using row 3. The game will intelligently swap between rows based on which dimension the player is in.
- All sprite images are from
tiled_sprites.bmp- The sprite will spawn at the top-left of the location. New sprites need to be added to this. - After saving your level, you must export it to json using ctrl+e. Tiled does not have a great way to automate this. (Yet?)
Music and sound effects are both made using FamiTracker. They are brought in using the famitone2 driver. This imposes a number of restrictions on the music and sounds created. Please see the famitone2 readme file for details.
All sound effects are in sound/sfx.ftm and all music is in sound/music.ftm. These should be exported from FamiTracker into sound/sfx.nsf and
sound/music.txt. (Details in the readme for famitone2 - yes, this is a little weird, but it's the default for that library.)
Graphics are designed using a tool called NES Screen Tool. They are generally put in files named *.chr, and compressed using PackBits compression from the Pin8 Legacy NES Tools collection. (With the exception of map_tiles.chr - because we access that data randomly.)
Palette data is also generated from NES Screen Tool - mainly so that we can reimport them into the tool to see what images will look like in the real world. Palettes are named (roughly) for the dimension they represent.
graphics/map_tiles.chr is a special case, as rows 2-5 of it are swapped out by the game based on what dimension we are looking at. The dimension the graphics
are for can be looked up from constants in main.asm.
- Initial release
- Fixed some obvious level issues
- Made some level design changes. Tries to make the path very slightly less linear.
- Now plays sfx when in warp areas
- Intro is now slower. (And sounds crummier... sorry :()
- Jump sound effect made less annoying (maybe)
- Added Exit to Title button
- Added return to A53 option (A53 builds only)
I've referenced most tools used inline, but here's a full list if you want the cliffnotes version of what you might want to install.
- FamiTracker
- famitone2
- NES Screen Tool
- NES Space Checker
- Pin8 Legacy NES Tools
- cc65 (Mainly use ca65, included with cc65)
- Gnu on Windows (GOW)
- nodejs
- fceux
- NintendulatorDx
- readnes3 (Strips header from roms for writing to INL cartridges)
- INL Retro Prog (For writing actual cartridges)
- VS Code and MADS Assembly Syntax (Okay, this is personal preference, but if you haven't given this a shot yet and you don't hate the idea of an IDE, I recommend it!)